
Three DIY hemming moves I use when pins slip, fabric puckers, or the hem flips up by lunch.
Washable hem tape for a try-on hem (not a forever one)
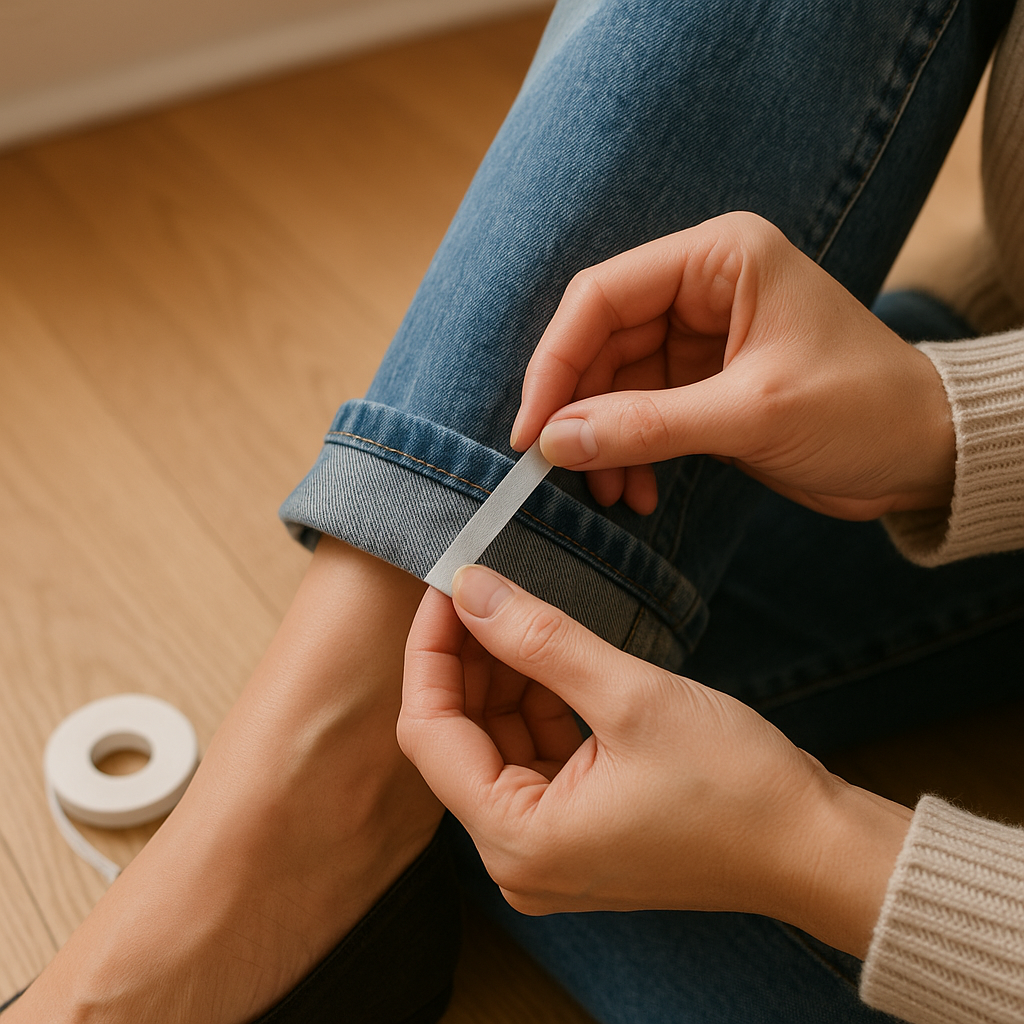
I love a clean stitched hem, but I do not love guessing the length at 11:47 pm and waking up to an uneven “why is my left ankle colder” situation. When I want a wearable test run, I use washable basting tape (Dritz Wash Away Wonder Tape is the one I keep rebuying) to hold the fold while I try the piece on and move like a person. Not a mannequin. It lets you check the real stuff: does the hem catch on your calf when you take stairs, does it hike up when you sit, does it look shorter from the back because the fabric pulls over your seat?
Here is how I do it so it behaves. Press the fold first, even if you hate ironing. A warm iron and steam gives you a crisp edge to tape to, otherwise you are just sticking tape to fluff. I put the tape on the inside of the garment, right along the fold, then peel and fold the hem up into place. No pins poking you, no clips falling off when you twist. If the fabric is shifty (rayon challis is the worst for pretending it is straight), I tape in short runs, like 6 to 8 inches at a time, and smooth as I go.
Two important reality checks. One, this is not a permanent hem method for most garments. Wash-away tape is for positioning while you stitch, or for a try-on hem you will undo. Two, it will gum up your needle if you try to sew through a heavy strip of it. If I am sewing the final hem, I either move the tape out of the stitch line or use tiny pieces placed away from where the needle lands. The payoff is simple: you get to live in the length for an hour before you cut or sew anything you cannot take back.
A steamer fixes that annoying hem flip in five passes
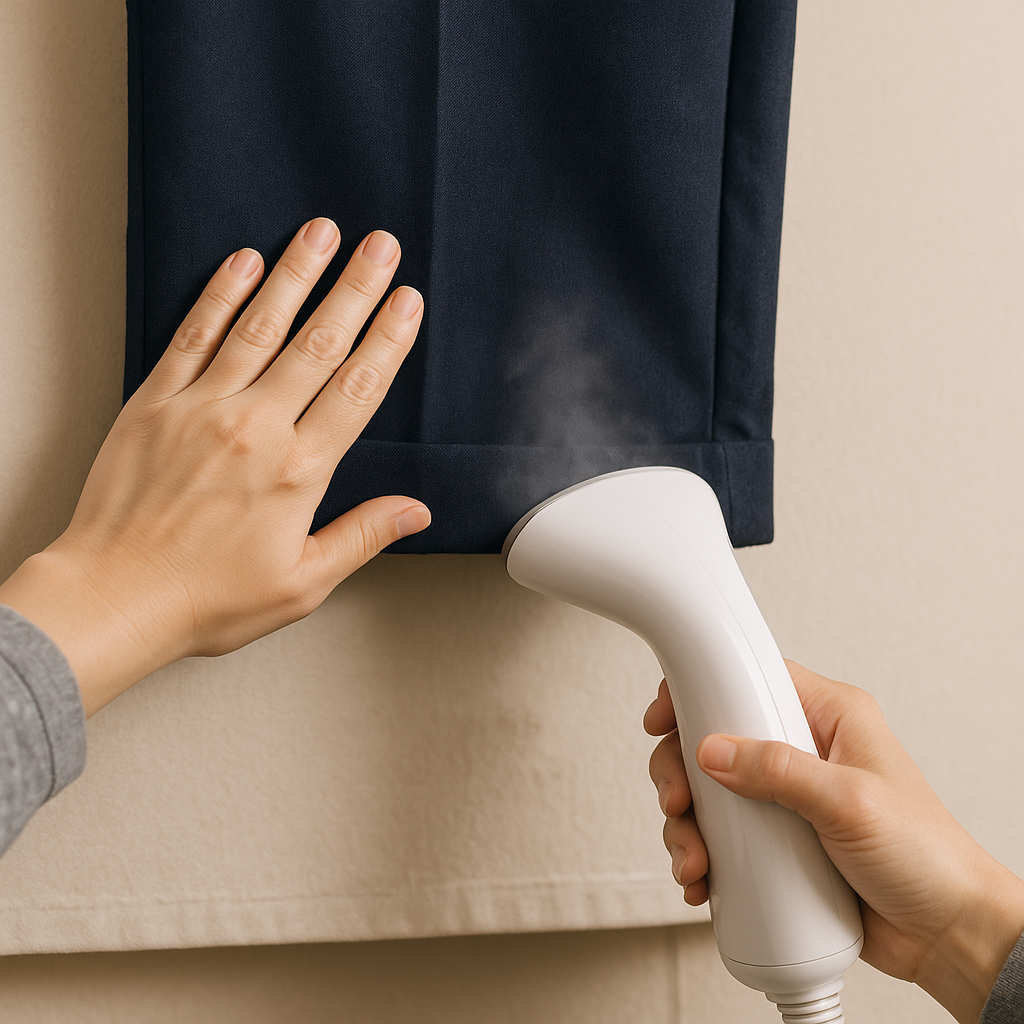
You know that hem that looks fine on the ironing board, then flips up the second you start walking and shows the inside like it is trying to tell on you? I run into it most with lightweight knits, slippery satin-y linings, and pants that were originally machine-hemmed with too much tension. Before I rip anything out, I grab my steamer (I have a Jiffy at home, but a small handheld works if you are patient) and I treat the hem like it needs retraining, not punishment.
The trick is directional steam plus your hand as a clapper. I hang the garment, fold the hem exactly where I want it, and steam from the inside first. Five slow passes, not a frantic blast. Then I press the fold with my palm through a pressing cloth or a clean cotton bandana, holding it in place for a few seconds while it cools. Heat sets, cooling locks it. If the hem still wants to kick out at the side seams, I steam those seams specifically and finger-press them flat, because that bulky seam allowance is often the little lever causing the flip.
When it needs more than steam, I will add structure with a strip of lightweight fusible hem tape made for fabric (the kind you press on). But I do that only after checking fiber content and using a low setting and a press cloth. Fusible is great on cotton and many poly blends, and it can be a melted mess on acetate or anything you cannot heat. And yes, test on the inside first. Steam also tells you if the hem was pressed wrong at the factory. You will see the old crease try to reappear like a ghost line. In that case, I steam it out fully, let it relax, then press the new line. The difference is immediate: the hem stops talking when you walk.
The 1-inch double-fold hem I use to add weight (and hide sins)
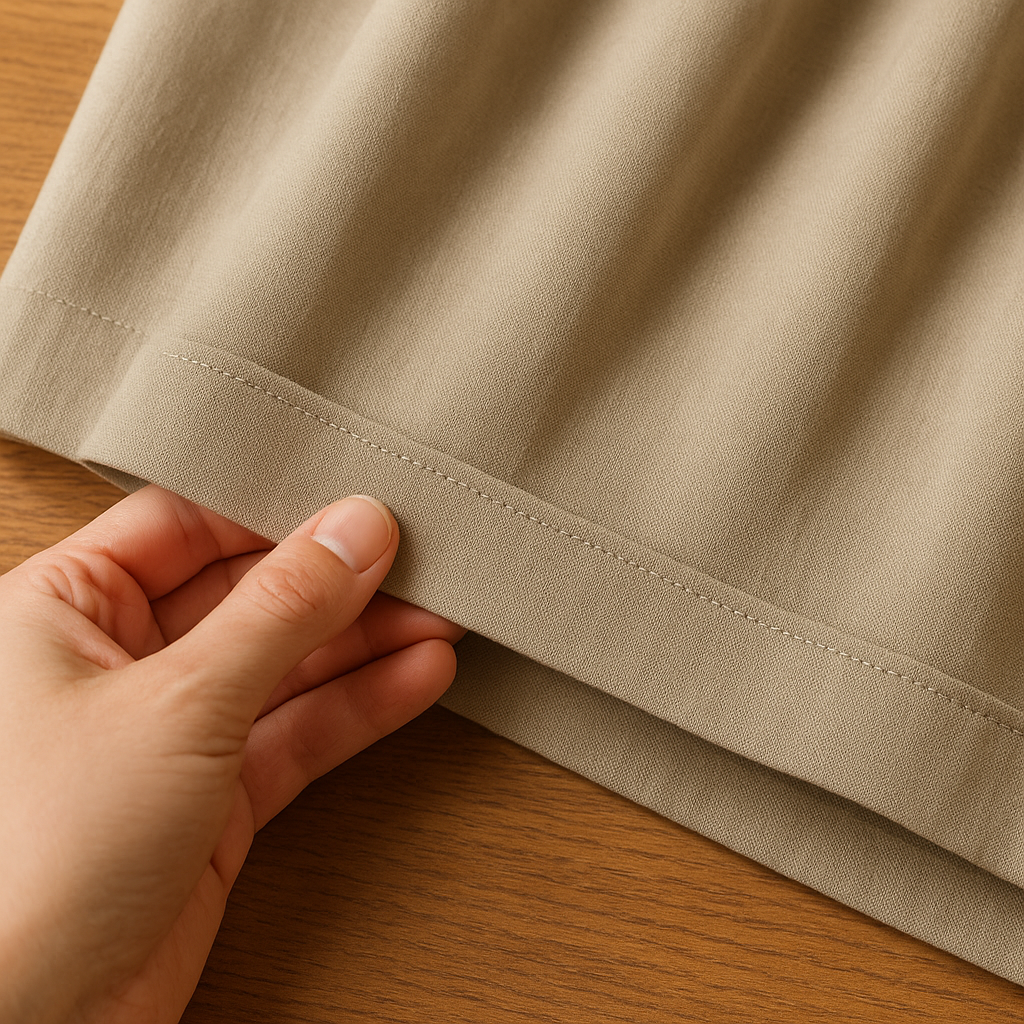
If you have ever hemmed a skirt or wide-leg pants and thought, “Why does it still look flimsy?” it is usually because the hem has no weight. A narrow turned hem can be pretty, but on a thin fabric it also telegraphs every wobble in your stitching and every little place you trimmed unevenly. My fix is the lazy 1-inch double-fold hem. It is not fancy. It is just dependable, and it makes a $14 thrift-store find hang like it got more attention than it did.
I measure the finished length, then add 2 inches for the hem allowance. First press up 1 inch all the way around, then press up another 1 inch so the raw edge is fully hidden. I am obsessive about pressing here because the fold is doing half the work. If the garment is a circle skirt or anything flared, I do not force the fold to behave in one go. I ease it in sections and use more steam than I think I need. You can feel when the fabric gives up and starts lying flat. That is when you stop wrestling it.
Then I stitch close to the inner fold. On my machine, that is a straight stitch at a slightly longer length than default so it does not pucker (around 3 mm is my starting point). If it is knit, I use a narrow zigzag so the stitches do not pop the first time I take a big step. If the fabric is prone to showing needle holes (some satins and coated fabrics are), I do a hand-sewn blind hem instead and keep the bites tiny. The best part of this hem is what it forgives: a slightly wavy cut line, a fraying edge, even an old hem crease you could not fully erase. It is also the hem I pick when I want the garment to swing instead of cling. Add weight, hide the chaos, move on with your day.